
Think of your garage floor as a blank canvas. Putting epoxy on a dirty, unprepared surface is like painting on a dusty chalkboard. It won't stick. Good concrete prep matters for any garage floor coating to last for years.
What if you skip this step or do a bad job? You will see peeling, bubbling, and chipping fast, especially with Colorado's freeze-thaw cycles and vehicle weight.
The goal is good coating adhesion. This separates a floor that looks good for months from one that handles daily use for years. This protects your concrete from damage and makes a safe, easy-to-clean surface.
The process involves cleaning to remove grease, oil, or old coatings. Then, you must profile the concrete. This means making a rough surface that the coating can grab. You can do this by grinding, shot blasting, or acid etching, based on the concrete's condition. Skipping steps spells trouble.
Garage floors get a lot of wear. When you consider an epoxy or resin coating, remember concrete isn't solid and impenetrable. It is porous, like a sponge that soaks things up.
That's where problems begin. Over time, your garage floor attracts gunk: oil drips, grease, dust, and dirt. A previous coating that peels or flakes makes it worse. This stuff sits on the surface and gets into the pores.
Now, try to stick a coating to that mess. It won’t work. The coating needs a clean, solid surface to grab. Contaminants prevent adhesion. Think about taping something to a dusty wall. Same idea. Skip prep, and your new floor coating will peel, bubble, or flake too soon.
Moisture is another issue. Concrete can hold moisture, especially in a place with temperature swings. If that moisture is trapped under your new coating, it can create pressure, leading to separation. Test for moisture levels before applying anything. If it's too high, address that first, or you're setting yourself up to fail.
First, clean the garage floor. Remove loose debris, dirt, and any flaking coatings. Scrub with a strong degreaser to lift oil or grease stains. Don't skip this step. Coating over dirt prevents proper adhesion and causes peeling. Rinse and let it dry. This ensures the coating bonds with the concrete.
Next, repair cracks or imperfections. Fill small cracks with concrete patching compound, forcing it in to remove air pockets. Use concrete repair mortar for larger cracks or damaged areas. Ignoring cracks lets them show through the new coating and worsen. Once dry, sand it smooth, level with the concrete. This creates a uniform surface for the coating.
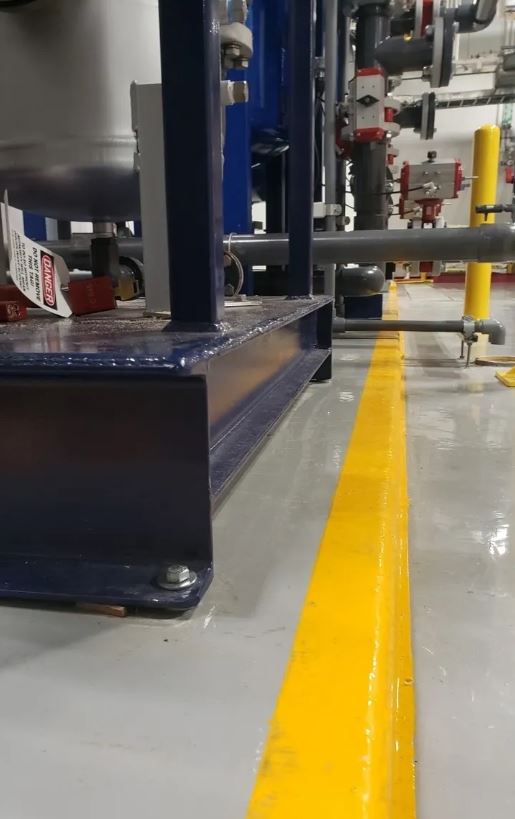
Surface profiling matters for garage floor coatings. Create a slightly rough texture on the concrete, giving the coating something to grip. Acid etching works, but mechanical grinding is often more effective. Aim for a Concrete Surface Profile (CSP) of 2 or 3 for epoxy coatings. If the surface is too smooth, the coating won't adhere. If it's too rough, you'll use more coating to fill the voids.
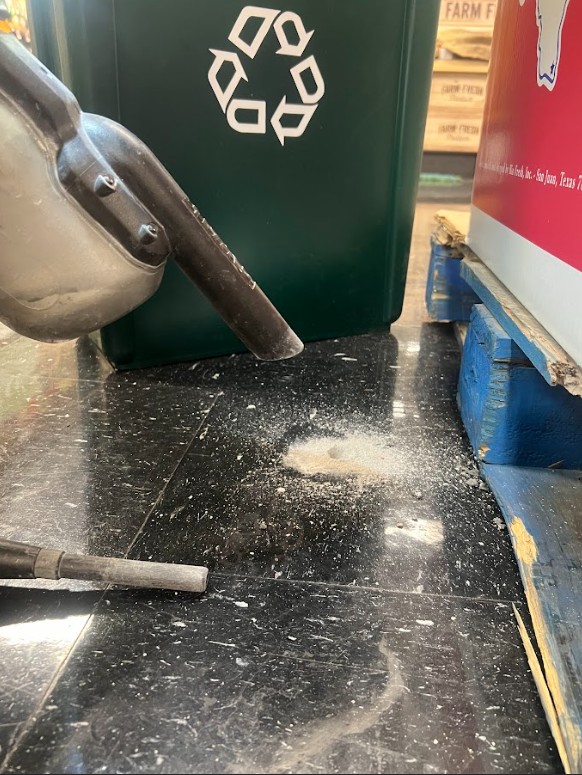
After profiling, clean again. Grinding and etching leave dust and residue that interferes with adhesion. Use a shop vacuum with a HEPA filter to remove dust, then damp mop to pick up remaining particles. Let the floor dry before coating. Dust or moisture can cause the coating to bubble or peel.
Before coating, test the concrete for moisture. Concrete wicks moisture, and high moisture content prevents proper bonding. Use a concrete moisture meter or do a plastic sheet test: tape plastic to the floor and check for condensation after 24 hours. If there's too much moisture, address the source before coating. Otherwise, the coating may fail.
Before you apply an epoxy or resin coating to your garage floor, clean the concrete. Remove all the oil, grease, and road salt that has soaked in over the years. If you don't, your coating won't stick. You might see peeling later.
There are a few ways to handle this. Degreasers work on grease and oil. They break down those hydrocarbons, so you can wash them away. Detergents work better for general grime. Pressure washing can blast away loose material, but it won't remove embedded contaminants.
Pick the right product for the mess you have. Read the labels! Some degreasers are harsh and need careful handling. Others are more eco-friendly. A strong detergent might not work on oil stains.
Follow the instructions. Dilute the product, let it sit for the recommended time, and rinse. Don't leave any residue that could affect your coating. If you aren't sure what you're dealing with, test a small area first.
You're considering garage floor coatings. That's smart, especially in places where garages get a lot of wear. But before epoxy or resin, you must fix any concrete cracks, holes, or uneven spots. Many people get this wrong.
The coating's quality depends on what it sticks to. Cracks show through the coating, and low spots stand out.
Start by cleaning. Pressure wash and scrub to remove loose material. For hairline cracks, use an epoxy crack filler. Follow the directions closely. For bigger cracks, use a concrete patching compound or a self-leveling overlay if the floor is uneven.
What about holes? Clean them and use a good concrete patch. Make sure the patch is level with the concrete to avoid bumps or dips. Leveling an uneven surface usually requires self-leveling concrete. It takes more work, but it's worth it. Otherwise, the coating will highlight imperfections.
Let the repair materials fully cure before coating. Read the manufacturer's directions and don't rush. If you skip this, you'll have problems later.
When you prep your garage floor for a coating, focus on getting the surface profile right. The coating needs something to grab. If the surface is too smooth, the coating won't stick. You'll see peeling and bubbling, which wastes time and money.
How can you profile concrete? Acid etching is one way, but it's not the best. It can be spotty and leave residue that hurts adhesion. Grinding gives you more control. Use different diamond grinding pads to get the profile you need. Shot blasting is like a super grinder. It uses tiny steel balls to blast the surface. It’s fast and works well, mostly for bigger areas.
The goal is the correct Concrete Surface Profile, or CSP. This measures how rough the surface is. Different coatings need different CSPs. A thin epoxy might need a CSP of 1 or 2. A thicker coating might need a CSP of 3 or higher. The coating maker should tell you the CSP you need. If you skip this, your coating will fail.
Before you put down a garage floor coating, you must test for moisture. Here is why: If moisture is trapped in the concrete, your new epoxy or resin coating will bubble, peel, and fail. That wastes time and money.
There are a couple of ways to test. One way is the calcium chloride test. You put calcium chloride in a dish on the concrete, seal it, and see how much moisture it absorbs over a set period. It's a reliable method. Another way uses relative humidity probes. These go into drilled holes in the concrete to measure humidity levels inside the slab.
What if you find moisture? Don't ignore it and hope for the best. You will regret it. There are solutions. Moisture mitigation systems block moisture from coming up through the concrete. They act as waterproof barriers. You can also use special sealers that allow the concrete to breathe while still protecting the coating. The right solution depends on the severity of the moisture problem and the coating you plan to use. Get it wrong, and you're back to square one with a ruined floor.
Garage floors get a lot of wear, right? If you want to coat yours, you have choices. Epoxy is popular. It's tough and looks great, but it needs a prepped surface to stick. Polyurethane coatings are more flexible. They handle impacts and temperature changes better than epoxy.
Also, consider polyaspartic coatings. They cure fast and resist chemicals.
Here is why: Not all concrete is the same. Some is smooth, some is rough, some has cracks, and some has existing coatings. The coating you pick must match the concrete's condition and how you prep it.
For example, if you pick epoxy, you need an aggressive surface profile, like diamond grinding or shot blasting. This opens the concrete, so the epoxy can grab on. Polyurethane might work on a less aggressively prepped surface, but you still need to clean it. While polyaspartic is tough, it needs a good base to work best.
Mess up the prep, and your coating will fail. It might peel, bubble, or wear away fast. So, take the time to find the best coating for your garage and ready the surface.
Thinking about coating your garage floor? Smart. Colorado garages face tough conditions with salt, snow, and oil. Before epoxy or resin, you must prep the concrete. That's where the DIY versus pro decision comes in.
DIY looks cheaper initially, and it can be. You save on labor. But are you saving? Consider the tools: a concrete grinder (renting one costs money), a shop vac, and patching compounds. Your time matters, too. Concrete prep is hard work.
Professionals cost more at the start. They have the right equipment and experience to spot cracks and old coatings. They often finish faster. They know how to profile the concrete right. Without proper profiling, your coating will peel, bubble, and fail. You don't want to pay twice.
Skill matters. DIY concrete prep isn't super hard, but it's not simple. You must grasp concrete porosity, how to etch the surface, and how to handle stains or sealers. Professionals do this daily and have seen everything.
A well-prepped floor with a pro coating lasts longer than a DIY job with bad prep. Weigh the costs. Think about your time, skill, and possible mistakes. Paying more at the start saves headaches and money later.

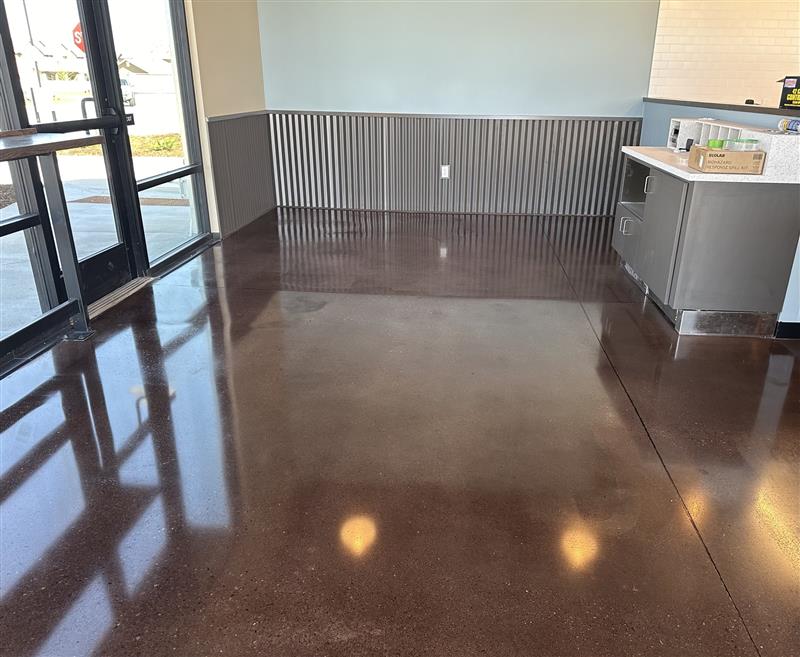
Maintaining a coated garage floor isn't hard, but it's key to making it last. Think of it this way: you wouldn't buy a nice car and never wash it, right? Same idea.
Regular cleaning is a must. Sweep up dirt often—leaves, whatever gets tracked in. Then, mop with mild soap and water. Harsh chemicals can dull or even harm the coating. Simple green products will work.
Protective mats are useful, especially under heavy toolboxes or where you park. These stop scratches and scuffs from tires or dropped objects. Try not to turn your wheels sharply when parked; that motion can wear down the coating faster.
Inspect your floor every few months. Look for cracks, chips, or areas where the coating is peeling. Spotting these early means you can fix them before they become big problems. Small repairs are cheaper than redoing the whole floor. If you see any problems, get them fixed by a pro soon. Neglecting maintenance? Your coating will fail sooner, leading to costly repairs or a replacement.
Creating the correct surface profile is crucial for coating adhesion. This involves roughening the concrete to provide a mechanical key for the coating. Common methods include abrasive blasting, grinding, and acid etching, each achieving different profile depths suitable for various coatings.
Excess moisture within concrete can lead to coating failures, such as blistering and delamination. Moisture testing helps determine if the concrete is dry enough for coating application. Mitigation techniques like applying moisture vapor barriers or allowing sufficient drying time are vital.
Concrete surfaces often contain contaminants like dust, oil, and laitance that hinder coating adhesion. Thorough cleaning using methods like pressure washing, solvent cleaning, or vacuuming is essential. Identifying and addressing specific contaminants ensures a clean surface for optimal bonding.
Want your garage floor to look great and last? Avoid peeling, bubbling, or coating failure. These problems often happen when people skip steps when prepping the concrete.
Concrete isn't always ready for a coating. It might have oil stains, dust, or an old, failing coating. You must remove these. If not, your new epoxy or resin won't stick.
The most common mistake? Cleaning the floor with soap and water. That won't work. You must profile the concrete, or rough it up. This helps the coating grip.
How? Mechanical grinding works well. You can also use acid etching, but be careful. Follow the directions closely. Rinse well! Acid residue will hurt your coating.
Another thing: moisture. Concrete is porous. Rising moisture will push your coating off. Test for moisture first. Simple kits are available. If moisture is a problem, you might need a special barrier coating.
Prep is annoying, but it's easier than redoing your floor later. Do it right the first time.
Why is prepping your garage floor for a coating such a big deal? Your garage floor sees a lot of action. Cars, tools, and heavy items all take their toll. Epoxy or resin coatings are strong, but they can only work if they stick well.
That's where concrete prep comes in. It's not just about looks. It’s about creating a surface the coating can bond to. If you skip steps or do a poor job, you set yourself up for failure. You'll get peeling, chipping, and a coating that won't last.
Think about painting. You wouldn't paint a dirty wall, right? The same idea applies here, but it's even more important because of the heavy use a garage floor endures. Put in the time to clean, grind, and fix the concrete. It will save you money and trouble. It makes sure the coating protects your floor and looks great for years. It's the base for the whole project.