
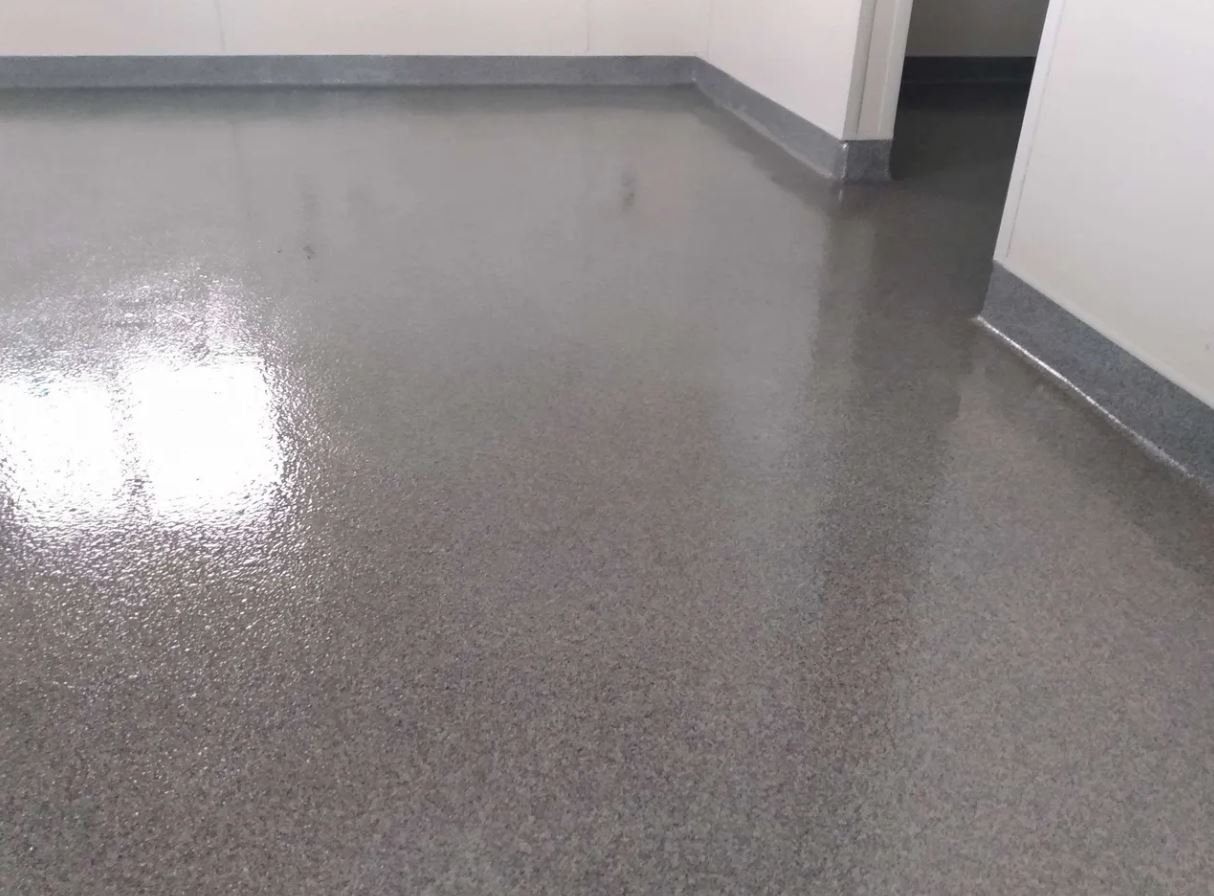
Resin coatings give your floors a durable, great-looking finish. Think of them as a shield that protects against wear. You get a smooth surface that handles a lot of use. Plus, it’s easy to clean and resists stains.
Why is surface preparation so important? Want a reliable Flooring Contractor in Denver customers choose for durable floor coatings.. If you skip this step or do it wrong, the resin won't stick well. It’s like painting a dirty wall—the paint won't stay. You'll get peeling, bubbles, or an uneven finish. That's not good.
For Denver homeowners, this makes the difference between a floor that lasts and one that needs repair. For commercial property owners and contractors, it avoids rework and keeps customers happy. No one wants to pay for a resin floor that fails quickly.
Whether it's a garage floor, a showroom, or a workspace, surface prep matters. It's the base for a lasting resin coating. Get this step right, and you're on your way to a great result. Mess it up, and you waste money.
Let's explore different resin coatings. You have epoxies, polyurethanes, and others. Epoxies are tough and resist chemicals. That makes them good for garages or industrial spaces where spills happen. Polyurethane coatings are more flexible and resist UV rays. They work better in sunny areas or where you need some give, like on a gym floor.
Here is why Denver's climate matters. We get big temperature swings. You want something that handles expansion and contraction without cracking. Polyurethanes are often a good choice because they are flexible. Epoxy can also work, but you might need a special formula for temperature changes.
Think about your flooring type. Concrete is common, and both epoxy and polyurethane stick to it. But you must prep the surface. More on that later. If you have tile or wood, you need a different approach. Maybe use a primer to help the resin stick. Picking the right resin affects how long it lasts and how good it looks. Don't skip this!
Without proper surface prep, the resin coating will not stick. It is like painting a dirty wall: the paint might look good at first, but it will peel off fast. With resin, this is adhesion failure. Your entire coating could lift, crack, or fall apart. This is true in busy areas or places with moisture. The bond between the resin and the base is key for lasting results, so do not skip the prep work.
Bubbles can wreck the smooth finish you want with resin. Bubbles often form because of trapped air or moisture. If the surface is not cleaned and dried, air or moisture will grow as the resin sets, making bubbles. Good surface prep will stop these issues by making a solid base for the resin. No one wants a bumpy floor, so take your time.
Your resin coating will wear out fast without surface prep. Dust, oil, or old coatings can be weak spots, causing scratches or total coating failure. A prepped surface makes a strong base that can handle daily wear. This is key in stores where floors get heavy traffic. It is about getting the most out of your money.
Spending money on surface prep might seem costly at first, but it saves you money later. By making a strong bond between the resin and the base, you avoid repairs or replacing the floor. Think of it as money spent on a floor that lasts. Fixing surface issues early stops bigger problems later, so it is a smart choice.
Surface prep has key steps: cleaning, grinding, and profiling. Cleaning gets rid of dirt that could hurt adhesion. Grinding makes a rough surface, so the resin can grip better. Profiling makes sure the surface is level. Each step is key to making a surface for a lasting resin coating. Do not take shortcuts. Follow these steps for the best results.
Before you apply a resin coating, you must inspect the surface. It could be concrete, wood, or tile. Walk the space and examine it closely.
What should you look for? Look for damage. Cracks in concrete, warped or rotted wood, or loose tiles must be fixed before you pour anything. The resin coating will highlight those problems or fail.
Contaminants are also important. Oil stains, grease, or old paint splatters will keep the resin from bonding. What about previous coatings? What is there? Is it failing epoxy or peeling sealant? You might need to remove it or scarify it for the new resin to bond.
Spotting these problems early matters. It is easier to fix a small crack now than to deal with a failure later. Ignoring these things invites trouble and costs more time and money. It is worth the effort to get this right.
Before you apply any resin coating, you must clean the surface. Many people mess this up. If dirt, oil, or grease is on the floor, the resin will not bond. This leads to peeling and bubbling, which is bad.
How do you clean it? It depends on what you are dealing with. For dirt and dust, scrub with a stiff brush and warm, soapy water. For oil and grease, use a degreaser. Many kinds exist, so read the labels. Make sure you use one that is safe for the surface. You do not want to damage the concrete.
Sometimes, you might need a pressure washer, especially for a dirty or stained surface. Be careful not to use too much pressure, or you could damage the floor. After cleaning, rinse well with clean water. Soap or degreaser residue can also affect the resin's grip. Let it dry before you open the resin. It might take a day or two, depending on humidity. Trust that it is worth the wait. A clean surface creates a lasting resin coating.
Applying a primer or sealer can improve adhesion and prevent substrate absorption. Primers create a uniform surface for the resin to bond to. Sealers prevent the substrate from drawing moisture or solvents out of the resin.
Thoroughly cleaning the surface is paramount for successful resin coating application. Eliminating dust, grease, and contaminants ensures proper adhesion. Neglecting this step can lead to coating failure, compromising the final result.
Abrading the surface creates a mechanical key for the resin coating. This process involves creating a slightly rough texture that the resin can grip onto. Proper abrasion enhances the bond strength and prevents peeling or delamination.
Before you apply a resin coating, fix any cracks, holes, or other surface flaws. Ignoring them spells trouble. The coating will only highlight those flaws, or it may fail early.
There are patching compounds and crack fillers, and they have different uses. Patching compounds work best for larger holes or damaged areas where you must rebuild the surface. Apply them, let them harden, and then sand them smooth.
Crack fillers are for cracks. They are more flexible than patching compounds. This flexibility matters because cracks can shift slightly as the building settles or temperatures change. A hard patch in a crack will crack again. Squeeze crack filler deep into the crack, and ensure it fills the space.
A common mistake is using the wrong product. What happens if you use crack filler on a big hole? It will shrink. What happens if you use a patching compound on a hairline crack? It will likely crack along with the original flaw. Use the correct product, follow the directions, and you will get a better result.
Resin Coating Failures: Identifying and Preventing Common Issues
Before you apply the resin coating, prep the surface. Grinding or profiling gives the resin something to grab. Otherwise, it might peel.
There are different ways to grind. Grinders with diamond grinding pads work well for concrete. The pad's grit level matters. A coarser grit removes more material. Use it on rough surfaces or to remove old coatings. Finer grits make a smoother surface. You might start with a 30-grit pad to open the concrete, then switch to an 80-grit pad to smooth it.
Why does this matter? If you don't grind enough, the resin won't bond. This can cause bubbles, peeling, and a bad-looking floor. You can also over-grind. If the surface is too smooth, the resin can't stick. Aim for the right spot: rough enough to grab, but not so rough that it causes problems with the resin laying flat. Get the right surface profile by creating tiny peaks and valleys for the resin to lock into. Surface profile gauges can help you find the sweet spot.
Did you grind the surface? Now, remove all dust and debris. If you don't, the resin coating won't stick. You'll get bubbles and peeling, and the finish will look bad. You don't want that.
Use a HEPA vacuum to handle this. Go over the area a few times. Get into all the corners and edges. Don't rush.
Even after vacuuming, dust may remain. Use a tack cloth to pick up fine particles. Wipe the entire surface. You might need several cloths.
Here is why this matters: Resin coatings need a clean surface to bond to. Dust acts as a barrier. It stops the resin from contacting the floor. If it can't bond, the coating will fail. This is true for coatings in commercial spaces. You need that durability, and you won't get it if you skip this step. It’s a pain, but you must do it right.
Priming isn't always a must, but it's often helpful. The primer makes a better surface for your resin coating to grip. This is key on surfaces that soak up liquid, like concrete or wood. Without a primer, the resin might soak in unevenly. This can cause weak spots or bubbles.
The primer type matters. For epoxy coatings, use an epoxy primer. They work well together and make a strong connection. Use a urethane primer for urethane coatings. Acrylic primers usually work for acrylic coatings.
Priming seals the base surface. This stops wetness from messing with the resin as it hardens. Wetness can wreck the look and cause discoloration or peeling. A primer also stops air bubbles from rising into the wet resin.
What happens if you skip the primer on a surface that might cause problems? You might get a coating that peels, cracks, or looks bad. Primer costs less than redoing the whole floor. Think of it as cheap protection.
Denver's climate and altitude affect how you prep surfaces for resin coatings. Here is why. You have old Victorian homes and new buildings. Each needs a different approach. Older homes might have lead paint or asbestos. So, take special precautions before coatings.
Altitude changes curing times. The air is thinner, so resins might take longer to harden. Pay attention to the manufacturer's specs and adjust. Do not assume it will cure as fast as at sea level.
Newer buildings have their own issues. Concrete might not be fully cured. There may be volatile organic compounds from construction. Moisture is also a problem. Denver is dry, but trapped moisture in concrete can still cause coatings to fail. Test the moisture content before you start. If you skip this, you might get bubbles or delamination. Nobody wants that.
Should you apply a resin coating yourself, or should you hire a pro? Cost is a primary consideration. DIY saves on labor. You buy all the materials, but mistakes cost money. Redoing the job can get expensive.
Time also matters. DIY takes more time, especially when you are learning. Pros have the experience and tools to finish faster with less disruption.
Experience counts. Resin coatings differ from paint. Mixing, application, and temperature affect the result. Pros manage these variables for a smooth, lasting finish.
DIY may work for simple projects, like a small garage floor. For larger or complex jobs, such as commercial spaces or intricate designs, hire a professional. You pay for expertise and the assurance of a job well done. Pros often provide warranties, which you don't get with DIY.
Let's talk about the cost of resin coatings. It's more than just the resin. You have to consider everything for a realistic idea.
First, there are the materials. Different resins have different prices. Epoxy is common, but polyaspartic or polyurethane might be better for your project. They do cost more upfront. Then, there are primers, topcoats, and additives like color pigments or flakes. Don't skimp!
Labor is a big factor. A professional installer knows how to prep the surface. They also mix and apply the coating for a smooth finish. That expertise costs money, but it's worth it to avoid bubbles, cracks, or peeling. DIY is an option, but mistakes can be expensive to fix.
Surface prep matters! This is important. Grinding, patching, cleaning adds to the cost. If you skip it, the resin won't bond, and your floor will fail. Proper surface preparation can be 20-30% of the total project cost, but it’s the base for a lasting, good resin floor.
Resin coatings aren't always cheap. But when you factor in the durability, stain resistance, and look, it’s often a good investment, especially if you want something that lasts!
Taking care of your resin-coated surfaces isn't hard, but a little care matters. Think of it as protecting an investment.
For daily cleaning, use gentle, non-abrasive cleaners. Avoid harsh chemicals. Usually, mild soap and water work. Microfiber mops help. They grab dirt without scratching.
Spills happen. Quickly clean them. The longer a stain sits, the harder it is to remove. For tough stains, try a resin cleaner. First, test it in a hidden spot. Also, don't scrub too hard, or you could dull the finish.
Want to prevent damage? Use mats at entrances to catch dirt. Furniture pads under legs stop scratches. While resin is tough, it's not invincible. Avoid dragging heavy items across it.
One more tip: Sunlight can cause some resins to yellow or fade. If you have big windows, use curtains or blinds to filter the light. Some shade can lengthen your floor's life.
Looking for a resin coating contractor in Denver? It's key to get this right. Don't just pick the first name you see. Dig a little.
Start with online reviews. See what others say. Google, Yelp, and the Better Business Bureau offer some information, but be aware that reviews can be fake or biased.
References are great. Ask the contractor for past clients you can contact. Call those people. Ask about the contractor's communication, work quality, and whether they met the schedule and budget. Did problems come up, and how did the contractor address them?
A project portfolio is a must. Look for projects like yours. Do you like their past work? Does it seem high quality? Ask about the products and techniques used on those projects.
Experience matters. Resin coatings aren't simple, and there is a learning curve. An experienced contractor knows how to handle surfaces, mix materials, and avoid mistakes that cause bubbling, cracking, or peeling. They also know the best products for Denver's climate, which affects how coatings cure.
Let's recap the need to prep your surface well for resin coatings. It's the base for a lasting floor.
Here is why: The best resin will fail if the surface is bad. You'll see bubbles, peeling, or poor bonding. Then you're back to square one.
Good materials and work cost more at first. But think of it as an investment. A well-prepped resin floor lasts for years with little upkeep. Redoing a bad floor costs more over time.
Also, a good resin floor adds more than strength. It adds appeal, safety, and value. It is easy to clean, resists stains, and changes the look of a space. So, do not skip the prep work. It helps you get the most from your coating.